Protect your home with expert leak detection and prevent costly damage before it starts. Discover how professional services quickly identify hidden leaks, saving you stress and money. Learn more about safeguarding your property today.
Protect your home with expert leak detection and prevent costly damage before it starts. Discover how professional services quickly identify hidden leaks, saving you stress and money. Learn more about safeguarding your property today.
Unlock the mystery of the empty string and its vital role in programming and language theory. Explore how this unique zero-length string shapes computing foundations and enhances your coding skills. Dive deeper into this essential concept today.
Keep your New Jersey home cozy with expert water heater maintenance tips. Learn simple steps to extend your heater’s lifespan and avoid costly repairs. Stay warm and save money—discover how to maintain your water heater efficiently today.

Struggling with pipe repairs at home Discover easy and effective techniques to fix common plumbing issues yourself Save time and money by mastering simple repair skills Explore our guide and get started today
Вавада зеркало теперь доступно для быстрого входа, что позволяет вам наслаждаться азартными играми без задержек и проблем с доступом. Получите мгновенное подключение к вашему аккаунту и забудьте о блокировках!
Используя зеркало Вавады, вы получаете тот же интерфейс, те же функции и возможность играть в любимые игры в любое время и в любом месте. Уже сегодня оцените удобство и надежность доступа к игровому порталу!
Чтобы быстро получить доступ к зеркалам Вавада, следует воспользоваться преимуществами, которые предоставляют альтернативные ссылки. Эти зеркала позволяют обойти блокировки и обеспечить стабильный вход на платформу. В первую очередь, рекомендуется сохранить актуальную ссылку на зеркало, обновляя ее по мере необходимости.
Для этого, посетите официальный сайт vavada, где можно найти последние обновления и доступные адреса. Многие пользователи предпочитают подписываться на уведомления или сообщества в социальных сетях, чтобы быть в курсе появления новых зеркал и изменений в доступе к сервису.
Также стоит использовать проверенные VPN-сервисы для обеспечения безопасности и анонимности при входе на сайт. Это поможет избежать возможных проблем с доступом и защитит ваши личные данные.
Доступность и стабильность. Зеркала Вавада обеспечивают бесперебойный доступ к игровым платформам. Это особенно важно в условиях нестабильности основного сайта, когда игроки могут столкнуться с блокировками или техническими сбоями.
Удобный интерфейс. Зеркала имеют тот же интерфейс, что и основной сайт, что позволяет игрокам легко ориентироваться в функционале и не испытывать дискомфорта при переходе на альтернативные ссылки.
Безопасность личных данных. Использование зеркал гарантирует защиту личной информации и финансовых транзакций. Все зеркала поддерживают современные стандарты шифрования, что минимизирует риски кибератак.
Быстрый доступ к бонусам. Игроки могут пользоваться всеми бонусными предложениями и акциями, доступными на основном сайте, благодаря чему игра становится более выгодной и интересной. Зеркала также могут предлагать эксклюзивные акции.
Кросс-платформенность. Зеркала Вавада легко доступны с различных устройств, включая мобильные телефоны и планшеты. Это позволяет игрокам наслаждаться любимыми играми в любое время и в любом месте.
Круглосуточная поддержка. Команда поддержки Вавада доступна для консультаций и помощи, что обеспечивает немедленное решение возникших проблем. Это повышает уровень комфорта и доверия со стороны игроков.
Что такое зеркало Вавада?
Зеркало Вавада – это альтернативный адрес официального сайта казино Вавада, который обеспечивает доступ к услугам и играм даже в случае блокировки основной страницы. Оно позволяет пользователям продолжать наслаждаться игрой без перерывов.
Как найти рабочее зеркало Вавада?
Рабочие зеркала можно найти на официальных страницах социальных сетей казино, специализированных форумах или у лицензированных партнеров. Мы рекомендуем избегать подозрительных источников и использовать только проверенные каналы.
Безопасно ли использовать зеркала?
Да, зеркала Вавада безопасны, если вы получаете их из официальных источников. Они обеспечивают такое же качество и безопасность, как и основной сайт. Обязательно проверяйте актуальность ссылок и используйте только проверенные зеркала.
Нужно ли регистрироваться заново на зеркале?
Если вы уже зарегистрированы на основном сайте Вавада, то повторная регистрация на зеркале не требуется. Используйте свои существующие логин и пароль для доступа к аккаунту с нового адреса.
Можно ли пополнить счет через зеркало Вавада?
Как часто обновляются зеркала Вавада?
Зеркала могут обновляться в зависимости от действий регулирующих органов. Рекомендуется следить за новостями казино и проверять актуальные ссылки, чтобы всегда иметь возможность быстро войти в свой аккаунт.
Погрузитесь в мир захватывающих слотов на платформе Pokerdom! Здесь вас ждут невероятные игровые автоматы, которые порадуют яркой графикой и увлекательным геймплеем. Каждая игра предлагает уникальные функции и возможности для выигрыша, которые не оставят вас равнодушными.
Пробуйте свои силы в разнообразных слотах от ведущих разработчиков! С Pokerdom вы получите доступ к огромному выбору игр, включая классические слоты, видеослоты и прогрессивные джекпоты. Каждый из этих автоматов наполняет игровой процесс адреналином и шансом на крупные выигрыши!
Не упустите свой шанс! Регистрируйтесь сегодня и воспользуйтесь специальными бонусами для новых игроков. Начните играть и ощутите радость от выигрышей с Pokerdom!
Первое, на что стоит обратить внимание, – это процент возврата игроку (RTP). Чем выше этот показатель, тем больше вероятность, что слот будет выгоден в долгосрочной перспективе. Обычно RTP составляет от 85% до 98%. Выбирайте слоты с RTP не ниже 95% для увеличения своих шансов на победу.
Следующий аспект – волатильность слота. Высоковолатильные игры предлагают большие выигрыши, но они реже выпадают. Низковолатильные слоты, наоборот, выдают меньшие, но более частые выигрыши. Обдумайте, какой стиль игры вам ближе, и выбирайте соответствующий слот.
Также стоит изучить особенности бонусных раундов и дополнительных функций. Многие слоты предлагают фри спины, множители и другие специальные возможности, которые могут существенно увеличить ваш выигрыш. Они часто становятся решающим фактором в выборе устройства.
Не забывайте об тематике и дизайне. Игра должна приносить не только прибыль, но и удовольствие. Выбирая слоты с интересной для вас тематикой, вы сможете лучше наслаждаться игровым процессом и дольше оставаться в игре.
И наконец, ознакомьтесь с отзывами других игроков. Часто их опыт может дать ценную информацию о том, насколько щедрым или интересным может быть выбранный вами слот. Для игры в надежном казино рассмотрите возможности, предоставляемые pokerdom казино, чтобы наслаждаться качественным игровым процессом и большими шансами на успех.
2. Vikings Go Berzerk - Слот с RTP 96,1% предлагает геймеру погрузиться в приключения викингов. Уникальная механика бонусов и возможность получить бесплатные спины увеличивает шансы на крупные выигрыши.
3. Gonzo's Quest - С этим слотом игроки отправляются в поиски сокровищ. RTP составляют 95,97%, а функция лавинных выигрышей способствует множественным выплатам за одно вращение, что делает игру еще более захватывающей.
4. Starburst - Один из самых известных слотов с процентом возврата 96,1%. Простота игры и яркая графика привлекают новых игроков и удерживают опытных, обеспечивая регулярные выигрыши.
5. Dead or Alive 2 - Этот слот с высоким RTP 96,8% предлагает уникальную бонусную игру с несколькими режимами, которые позволяют игрокам увеличить свой выигрыш ближе к желаемым правилам. Эпическая тематика добавляет азарт в процесс игры.
Управление банкроллом – ключевой аспект успешной игры в слоты на Pokerdom. Эффективное распределение средств позволяет минимизировать риски и увеличить шансы на выигрыш. Вот несколько стратегий, которые помогут вам в этом процессе.
Первое, что нужно сделать, – установить пределы для ваших ставок. Определите максимальную сумму, которую вы готовы потратить за игровую сессию. Это поможет избежать излишних затрат и сохранит ваш банкролл на длительный срок.
Используйте метод "одной тысячи" – основное правило, которое рекомендовано многими игроками. Оно заключается в том, чтобы ваш банкролл состоял из 1000 единиц условной валюты. Ставьте не более 1% от общего банкролла за одно вращение. Например, если ваша сумма составляет 1000 рублей, ставка не должна превышать 10 рублей.
Следующий совет – менять размер ставки в зависимости от состояния банкролла. Если у вас удачный день и средства увеличиваются, вы можете позволить себе повысить ставки. В противном случае, если вы сталкиваетесь с рядом проигрышей, желательно снизить размер ставок, чтобы продлить игру и минимизировать потери.
Также стоит вести учет своих выигрышей и проигрышей. Это позволит анализировать результаты и понимать, какие стратегии работают лучше. На основе статистики можно скорректировать свои действия и принимать более обоснованные решения в дальнейшем.
Не забывайте про бонусы и акции Pokerdom. Используйте специальные предложения, чтобы увеличить свой банкролл без дополнительных затрат. Это даст вам преимущество и позволит продлить игровую сессию.
Следуя этим стратегиям, вы сможете эффективно управлять своим банкроллом и повысить свои шансы на успех при игре в слоты на Pokerdom.
When it comes to household plumbing problems, no one likes to think about what might seem like minor water leaks. But if you don't give such an issue the attention that it deserves, the consequences for your home could be dire! At Jersey Plumbing Service, we know how important it is to identify and repair leaking pipes before their damage becomes irreversible and more extensive. In this blog post, we'll dive into what can happen when a leak isn't taken care of quickly - so keep reading!
The importance of finding and stopping a water leak as soon as possible
The urgency of addressing a water leak at its initial stage cannot be overstated. Water leaks, when left unattended, can lead to numerous problems that may cause extensive damage to your property and pose significant health risks for its inhabitants. A persistent water leak has the potential to weaken the structural integrity of your home, leading to costly repairs and even compromise its overall stability. Moreover, moisture buildup from leaks can contribute to mold growth, which may exacerbate allergies, asthma, and other respiratory issues. Furthermore, uncontrolled water leaks can result in skyrocketing utility bills. Thus, it is crucial to detect and repair water leaks as soon as possible to protect your property, health, and financial well-being.
Potential physical damage from a water leak, including mold, rotting floorboards or walls, and foundational weakening
A water leak in your home or building can lead to severe and costly consequences if left unaddressed. One of the most significant issues arising from untended water leaks is the rapid spread of mold, which can pose detrimental health risks to occupants and compromise the structural integrity of the building. Moreover, moisture seepage into floorboards and walls can result in rotting and decay, weakening these essential components and potentially causing them to collapse. Perhaps most alarmingly, the constant influx of water can gradually erode a building's foundation, dramatically increasing the risk of the structure becoming unstable or even collapsing altogether. Thus, it is crucial to tackle water leaks immediately to avoid such devastating outcomes.
How water leaks can lead to increased utility bills if left unchecked
Water leaks, though seemingly insignificant at times, can have a major impact on our utility bills when left unattended. As water continuously drips or flows out of a damaged pipe or fixture, the amount of water wasted accumulates and contributes to an unexpected spike in our monthly expenses. Furthermore, undetected leaks may lead to more severe issues such as structural damage, mold growth, and potential health hazards - all of which could incur additional repair costs. Consequently, it is crucial for homeowners to regularly inspect for potential leakage and promptly address any issues identified. By doing so, not only are we able to maintain a safe and comfortable living environment, but also effectively manage our expenses and minimize the burden of skyrocketing utility bills.
How long-term exposure to mold and mildew can cause health problems for you and your family
The hazards of long-term exposure to mold and mildew should not be taken lightly, as this toxic presence lurking in the corners of our homes can have significant health consequences for ourselves and our loved ones. Mold and mildew are fungi that thrive in damp, warm, and humid environments, silently releasing airborne spores capable of causing various symptoms and ailments. These invaders target our respiratory systems, with individuals suffering from asthma or allergies being particularly vulnerable. Over time, the inhalation of these spores can result in chronic coughing, sneezing, and wheezing, along with irritated eyes, skin, and sore throats. Furthermore, prolonged exposure may lead to more severe health issues such as lung infections, sinusitis, toxic mold syndrome, and even cognitive disorders. Thus, it is crucial for everyone to be aware of the potential dangers of living with mold and mildew and take appropriate actions to mitigate their proliferation in our living spaces. Protecting our families is paramount; it begins with a clean and healthy home environment.
Jersey Plumbing Service can help inspect for water leaks and recommend necessary repairs
Water leaks can be a persistent and damaging issue in both residential and commercial properties, leading to considerable losses and structural concerns. At Jersey Plumbing Service, we are committed to providing thorough inspections for such leaks, enabling you to quickly identify and address these problems. Our team of experienced professionals will not only detect potential water leaks but also analyze their origin and severity. As a result, we can offer targeted recommendations for necessary repairs to prevent further damage and restore the integrity of your plumbing systems. Trust in the serious and dedicated work of Jersey Plumbing Service to safeguard your property's foundation and ensure the efficient operation of your water supply infrastructure.
How to best prevent future water leaks from occurring in your home
Water leaks in your home can lead to costly repairs, structural damage, and a myriad of health issues that may result from mold and mildew growth. Nipping the issue of leaking water in the bud by taking preventative measures is of paramount importance. In order to shield your home from potential water leaks, it is crucial to carry out regular inspections of pipes, faucets, and other water fixtures, ensuring they are in good condition, and replacing worn-out parts as needed. Additionally, maintaining a safe water pressure range, installing a water leak detection system, and being mindful of external factors such as fluctuations in temperature can all help to reduce the possibility of water leaks. Beyond these preventative measures, do not hesitate to reach out to plumbing professionals for guidance and advice, as they can identify potential leaks and risks, ensuring you and your home remain safe from the negative consequences of water leaks.
Leaks are a serious issue that need to be addressed urgently. Ignoring them can be risky and costly, leading to even more damage and distress. Fortunately, Jersey Plumbing Service is able to detect water leaks in your home quickly and efficiently. Whether its from a fixture, pipe, or roof – you can rely on us to take care of the problem. Ultimately, prevention will save you headaches down the line. Taking preventive maintenance precautions such as monitoring faucets for slow buildup of calcium deposits, inspecting pipes periodically for aging signs, and checking gutters and downspouts for blocked drains are all proactive steps you should consider taking today to help ensure future water leaks don’t happen in your home. If you encounter any water leak problems now or in the future don’t hesitate – contact Jersey Plumbing Service so we can fix it!
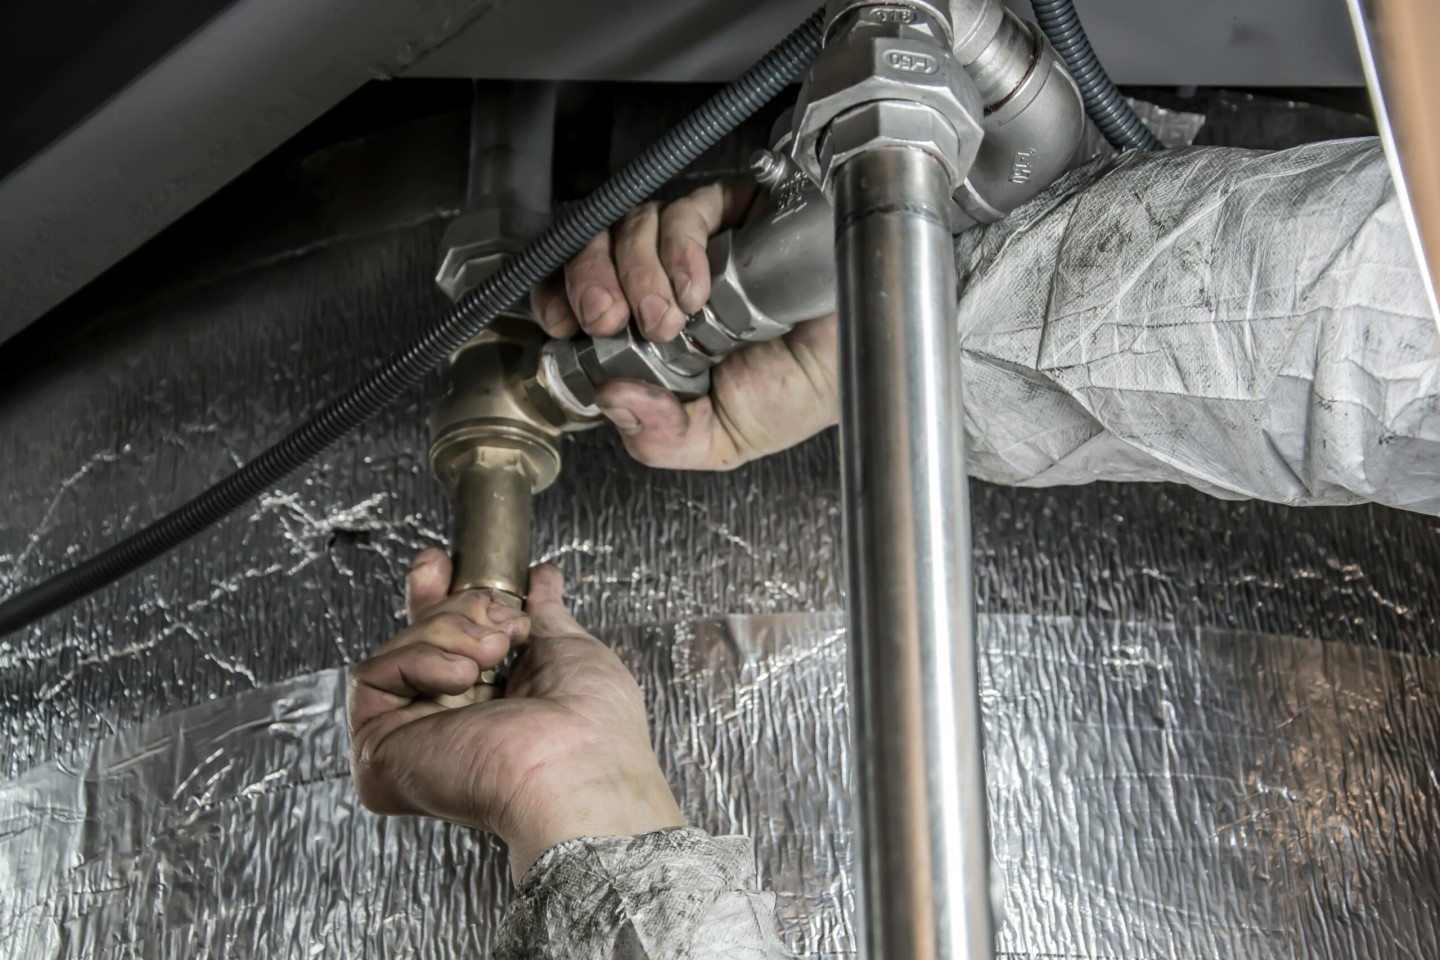
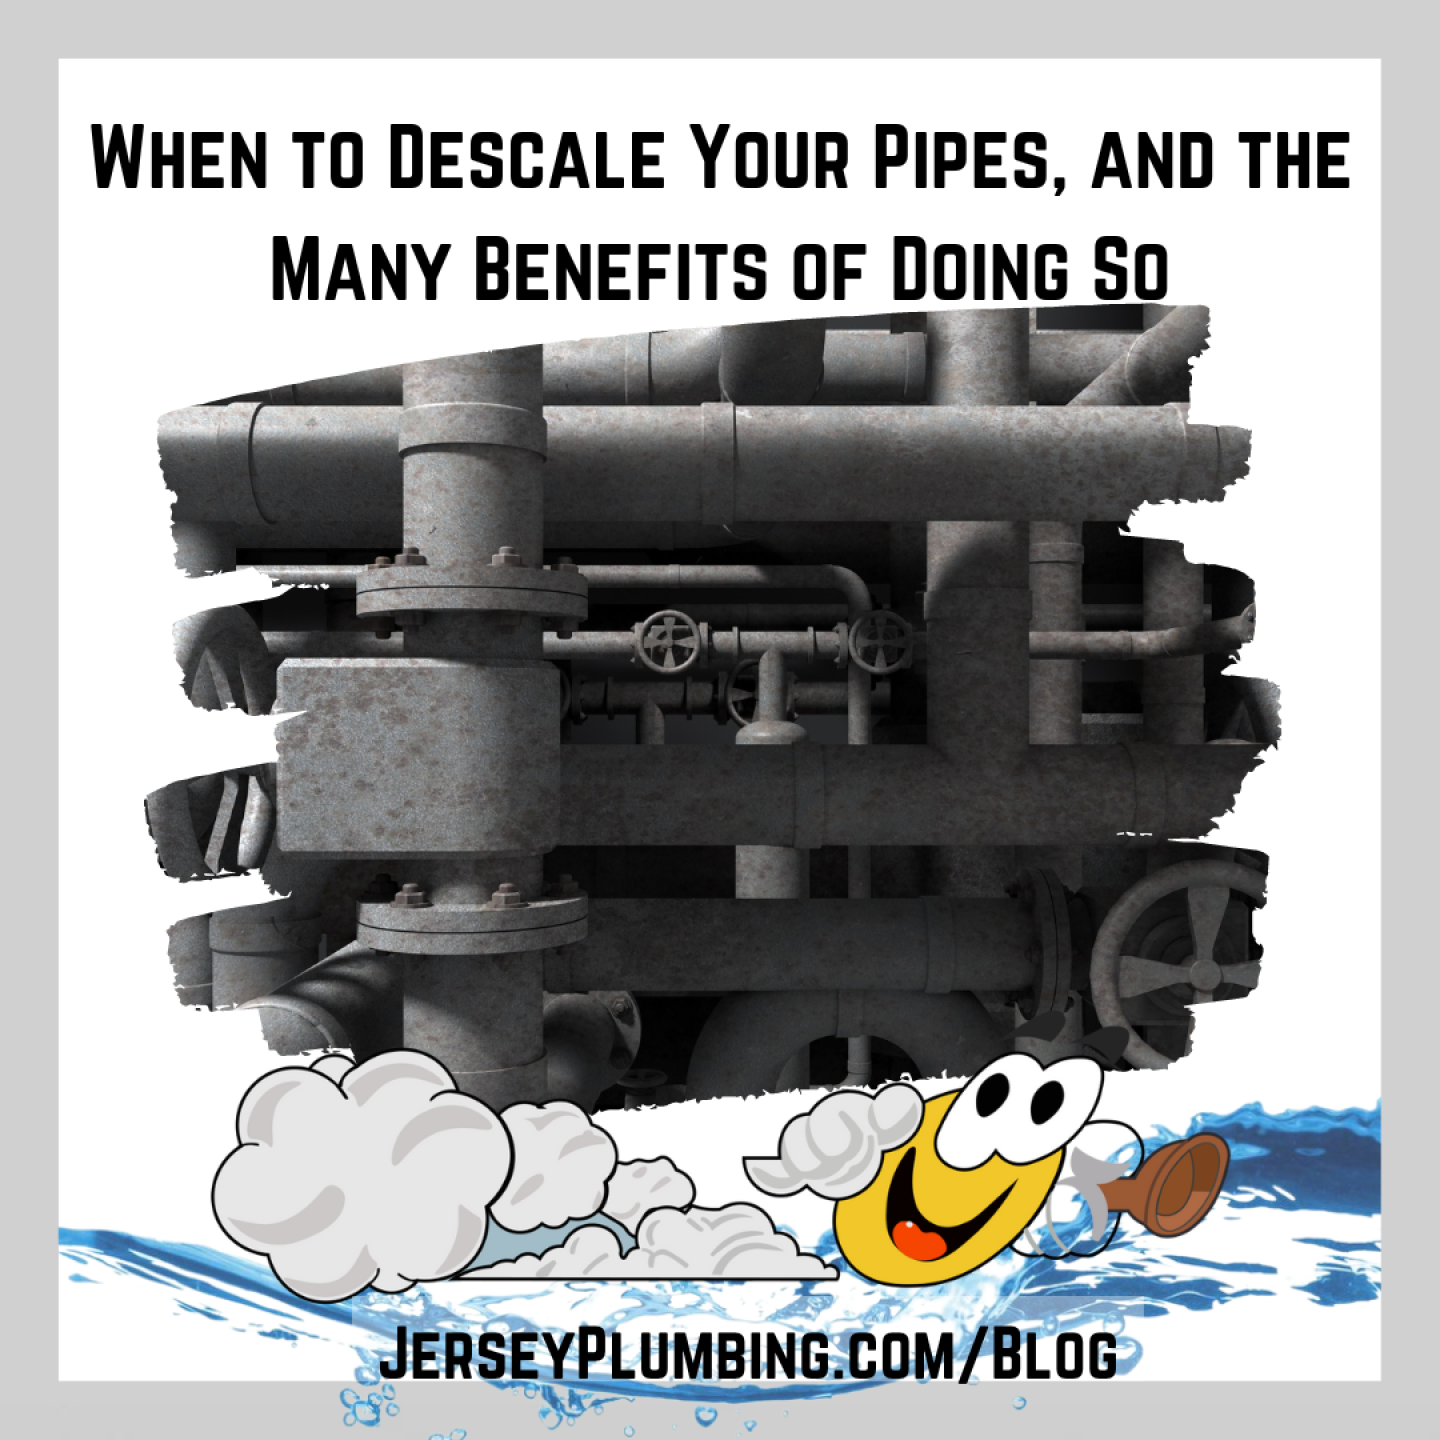
As a homeowner, your pipes are an integral part of the infrastructure that helps keep your home running smoothly. Over time, mineral buildup can occur inside your pipes and if left untreated, it can cause significant problems like clogged or slow-flowing drains and pipe corrosion. The good news is pipe descaling is an effective solution to prevent major damage before it occurs. In this blog post we'll discuss when to descale your pipes and explore all the benefits associated with doing so. Jersey Plumbing services offer cost-effective solutions for descaling your pipes quickly and safely – read on to find out more!
Why Descaling Pipes is important
The importance of descaling pipes cannot be overstated, as the buildup of mineral deposits and other obstructions can dramatically affect the efficiency and longevity of your plumbing system. Over time, these accumulations can restrict water flow, contribute to corrosion, and even lead to pipe failure. It is essential to be diligent about descaling pipes to maintain optimal water pressure and quality, ensuring the health and safety of occupants in any building. Moreover, descaling plays a vital role in reducing the risk of costly and disruptive leaks, bursts, or other damages to utility infrastructures. Hence, investing in regular pipe descaling is a prudent decision that benefits not only the health of the plumbing system but also contributes to a sustainable and eco-friendly way of managing water resources.
Benefits of Descaling Your Pipes, Including Improved Water Quality and Efficiency
The process of descaling your pipes carries numerous benefits, chief among them being the improvement of water quality and increased efficiency. As time passes, it's normal for residue to accumulate within your pipes, forming a layer of limescale and other impurities that can obstruct the flow of water. This buildup not only affects the taste and appearance of your water, but also causes a decline in efficiency by forcing your plumbing system to work harder in order to maintain proper water pressure. By investing in regular pipe descaling, you remove these stubborn deposits, thereby allowing for a purer, more consistent flow of water throughout your home. This ultimately translates into both fresher-tasting water and a more efficient plumbing system, which in turn results in notable savings on your energy bills. A proactive approach to pipe maintenance, descaling is a simple yet valuable undertaking that can make a world of difference in the quality and performance of your home's plumbing.
How to Identify When Descaling is Needed
In maintaining a healthy and efficient water-based system, it crucial to recognize when descaling is necessary. Over time, minerals and limescale can adhere to surfaces of pipes and plumbing fixtures, compromising the performance and longevity of these essential systems. Identifying the need for descaling primarily depends on observing certain signs such as changes in water flow, frequent clogging of faucets, fluctuating water temperatures, and unusual noises emanating from the plumbing system. When these symptoms persist, it is an indication that it's high time to undertake a thorough descaling process. Attending to this timely requirement not only restores efficiency but also ensures the durability and sustainability of your water-based systems, ultimately preserving the overall value of your investment.
Jersey Plumbing Service Can Descale Your Pipes Efficiently and Cost Effectively
Jersey Plumbing Service takes pride in offering clients an efficient and cost-effective solution to descale their pipes. Over time, accumulated mineral deposits can narrow the inner walls of pipes, leading to decreased water pressure and ultimately, a decline in efficiency. By utilizing advanced technologies and industry-proven methods, our skilled technicians work diligently to restore your plumbing system to its optimal performance. Not only do we help prevent potential costly repairs, but our focus is also to ensure a long-lasting and hassle-free experience for our valued customers. Choose Jersey Plumbing Service for dependable and high-quality pipe descaling solutions that can save you time and money.
Cost Savings from Descaling Your Pipes Regularly
By regularly descaling your pipes, you're making a wise investment that facilitates long-term cost savings for your property. Over time, mineral deposits accumulate in pipes, leading to limited water flow and causing appliances to work harder, ultimately reducing their lifespan. By descaling your pipes on a consistent basis, you not only increase their longevity, but also help maintain the efficiency of household appliances, such as water heaters and washing machines. Consequently, this routine maintenance mitigates the likelihood of sudden, costly breakdowns and promotes energy efficiency, leading to lower utility bills and improved financial security. Remember, prevention is always better than cure, especially when it comes to safeguarding your property's essential infrastructure.
In conclusion, descaling your pipes can save you money in the long run and provide you with an improved water quality. Descaling your pipes gets rid of built up rust and sediment that can cause clogs or reduce the flow of water through your system. Additionally, it helps to reduce energy bills since the water is flowing more freely. With all these benefits, it makes sense to take advantage of Jersey Plumbing Service to descale your pipes efficiently and affordably. Regular pipe maintenance can help prevent potential blockages and improve efficiency in the long run. Keep these tips in mind when thinking about taking action on descaling your pipes so you can reap the maximum rewards!
Секреты успешной игры ждут вас! Используйте уникальный код при каждой ставке, чтобы мгновенно получить дополнительные преимущества. Это идеальный способ увеличить ваши шансы на выигрыш и сделать процесс ещё более увлекательным. Не ждите, заходите на платформу и откройте для себя новые возможности!
Каждая ставка с кодом открывает двери к эксклюзивным предложениям! Инвестируйте в своё время и максимизируйте результативность. Разнообразьте свой игровой опыт и позвольте удаче стать вашим спутником.
Зарегистрируйтесь на сайте 1win, если у вас еще нет учетной записи. Это первый шаг для получения предложений. Заполните все необходимые поля и подтвердите свою регистрацию.
После этого зайдите в раздел ввода купонов. Обычно он находится в личном кабинете или на странице пополнения счета. Вы увидите пустое поле, куда нужно вставить ваш код.
Вставьте код, который у вас есть, и нажмите на кнопку активации. Обратите внимание на условия, чтобы не упустить важные моменты. Возможно, потребуется сделать минимальный депозит для активации.
После успешного ввода проверьте баланс. Если все сделано правильно, средства или предложения появятся на вашем счете. Чтобы быть в курсе новых акций, следите за обновлениями на сайте, ведь они меняются. Узнать больше о актуальных предложениях можно по ссылке: 1win casino промокоды 2025.
Сохраните деньги, воспользовавшись уникальным предложением, которое предоставляет вам возможность снизить затраты на ставках. Применяя код, вы легко получите доступ к увеличенным коэффициентам и специальным предложениям, что сделает ваши ставки более выгодными.
Увеличьте шансы на выигрыш благодаря дополнительным функциям, которые доступны только при активации кода. Это может быть расширенный набор спортивных событий или дополнительные опции для ставок, что добавляет гибкости в вашу стратегию.
Получите возможность опробовать разные варианты игры без лишних затрат. Это открывает двери для изучения платформы и выбора наиболее подходящих для вас направлений.
Наслаждайтесь улучшенным опытом использования сервиса. Эксклюзивные предложения часто дают доступ к моментальным выплатам или специальным турнирам, предоставляя больше шансов на успех.
Будьте в курсе актуальных акций и новинок. Применяя код, вы не только получаете выгоды, но и становитесь частью сообщества, которое всегда информировано о последних событиях и предложениях.
Как воспользоваться кодом? Введите его в специальном поле при регистрации или пополнении счета. Система автоматически зачислит преимущества на ваш баланс.
Где найти актуальные коды? Посетите официальный сайт и следите за обновлениями в социальных сетях или на партнерских ресурсах. Часто появляются уникальные предложения.
Какой размер предложенной выгоды? Размер может варьироваться в зависимости от текущих акций. Обычно вы сможете получить от 100% до 200% на сумму первого депозита или другие заманчивые предложения.
Существуют ли ограничения по использованию? Да, каждый уникальный код может быть использован только один раз. Проверяйте условия акций, чтобы избежать неожиданностей.
Как проверить, зачислились ли преимущества? Перейдите в раздел "Текущие предложения" в личном кабинете. Там будет указано, находятся ли средства на вашем счете.
Можно ли комбинировать предложения? Часто такие возможности ограничены, но конкретные условия уточняйте в правилах каждой акции.
Что делать, если код не сработал? Убедитесь, что вы не допустили ошибок в вводе. Если все верно, обратитесь в службу поддержки для уточнения причин.
Существуют ли временные рамки на использование преимуществ? Да, определенные предложения могут иметь срок действия. Необходимо воспользоваться ими в указанные сроки.
Только сегодня у вас есть шанс получить увеличенный стартовый капитал для азартных развлечений. Зарегистрируйтесь и откройте для себя уникальные предложения, чтобы ловить удачу за хвост!
Широкий выбор игр на любой вкус, приятные условия и мгновенные выплаты ждут вас. Не упустите возможность ощутить азарт с первых минут вашего участия!
Перейдите на сайт и нажмите на кнопку регистрации. Заполните все необходимые поля: укажите адрес электронной почты и придумайте пароль. Убедитесь, что ваш пароль надежен – используйте комбинацию букв, цифр и символов.
После того как заполните форму, вам будет предложено подтвердить электронную почту. Проверьте папку "Входящие" и следуйте инструкции в полученном письме. Это критически важно для завершения процесса создания профиля.
После подтверждения, войдите в свой аккаунт. Обратите внимание на раздел с акциями и предложениями – тут можно найти информацию о приветственной программе. Часто нужно будет активировать ее, выполнив определенные действия, например, внеся депозит.
Не забывайте проверять условия акций. Обычно указываются требования по ставкам и списку игр, в которых можно использовать предложение. Следуя этим шагам, вы быстро получите приятное дополнение к своему игровому опыту.
Проверьте минимальную сумму для ставок, чтобы активировать средства. Часто она варьируется в зависимости от предложений. Убедитесь, что вы ознакомились с требованиями к ставкам. Обычно вам нужно будет сделать определенное количество ставок перед тем, как вывести выигрыши.
Срок действия акций может иметь свои ограничения. Иногда.clock time-frame для использования начислений составляет от нескольких дней до месяца. Следите за этим, чтобы не упустить возможность воспользоваться акцией.
Возможно, существуют ограничения на игры, в которых можно использовать средства. Ознакомьтесь с перечнем доступных дисциплин, чтобы избежать недоразумений.
Не лишним будет обратить внимание на требования к гражданству и месту жительства. Некоторые предложения могут действовать только для определенных стран или регионов.
Обратите внимание на правила по одному единственному бонусу на пользователя или домохозяйство. Если вы открываете несколько аккаунтов, это может привести к блокировке.
Попробуйте слоты, такие как "Book of Ra" и "Starburst". Они предлагают увлекательные механики и отличные шансы на выигрыш. В этих играх легко понять правила, что позволит вам сосредоточиться на удовольствии от игры.
Стоит обратить внимание на карточные игры, такие как блэкджек и покер. Здесь важна не только удача, но и стратегия. Освойте несколько базовых тактик, и результат не заставит себя ждать.
Не забудьте про настольные игры, которые обеспечивают интересное взаимодействие с другими игроками. Попробуйте рулетку, она добавляет элемент азарта и неожиданности в игровой процесс.
Также загляните в раздел живых игр. Здесь реальный дилер создает атмосферу настоящего казино, что делает опыт максимально захватывающим. Сумейте адаптировать ваше времяпрепровождение к стилю игры, чтобы получить максимум от каждого предложения.
Подробную информацию о всех актуальных предложениях можете найти по ссылке: бонусы эпикстар казино. Не упустите шанс улучшить свой игровой опыт, используя доступные возможности!
Recent Comments