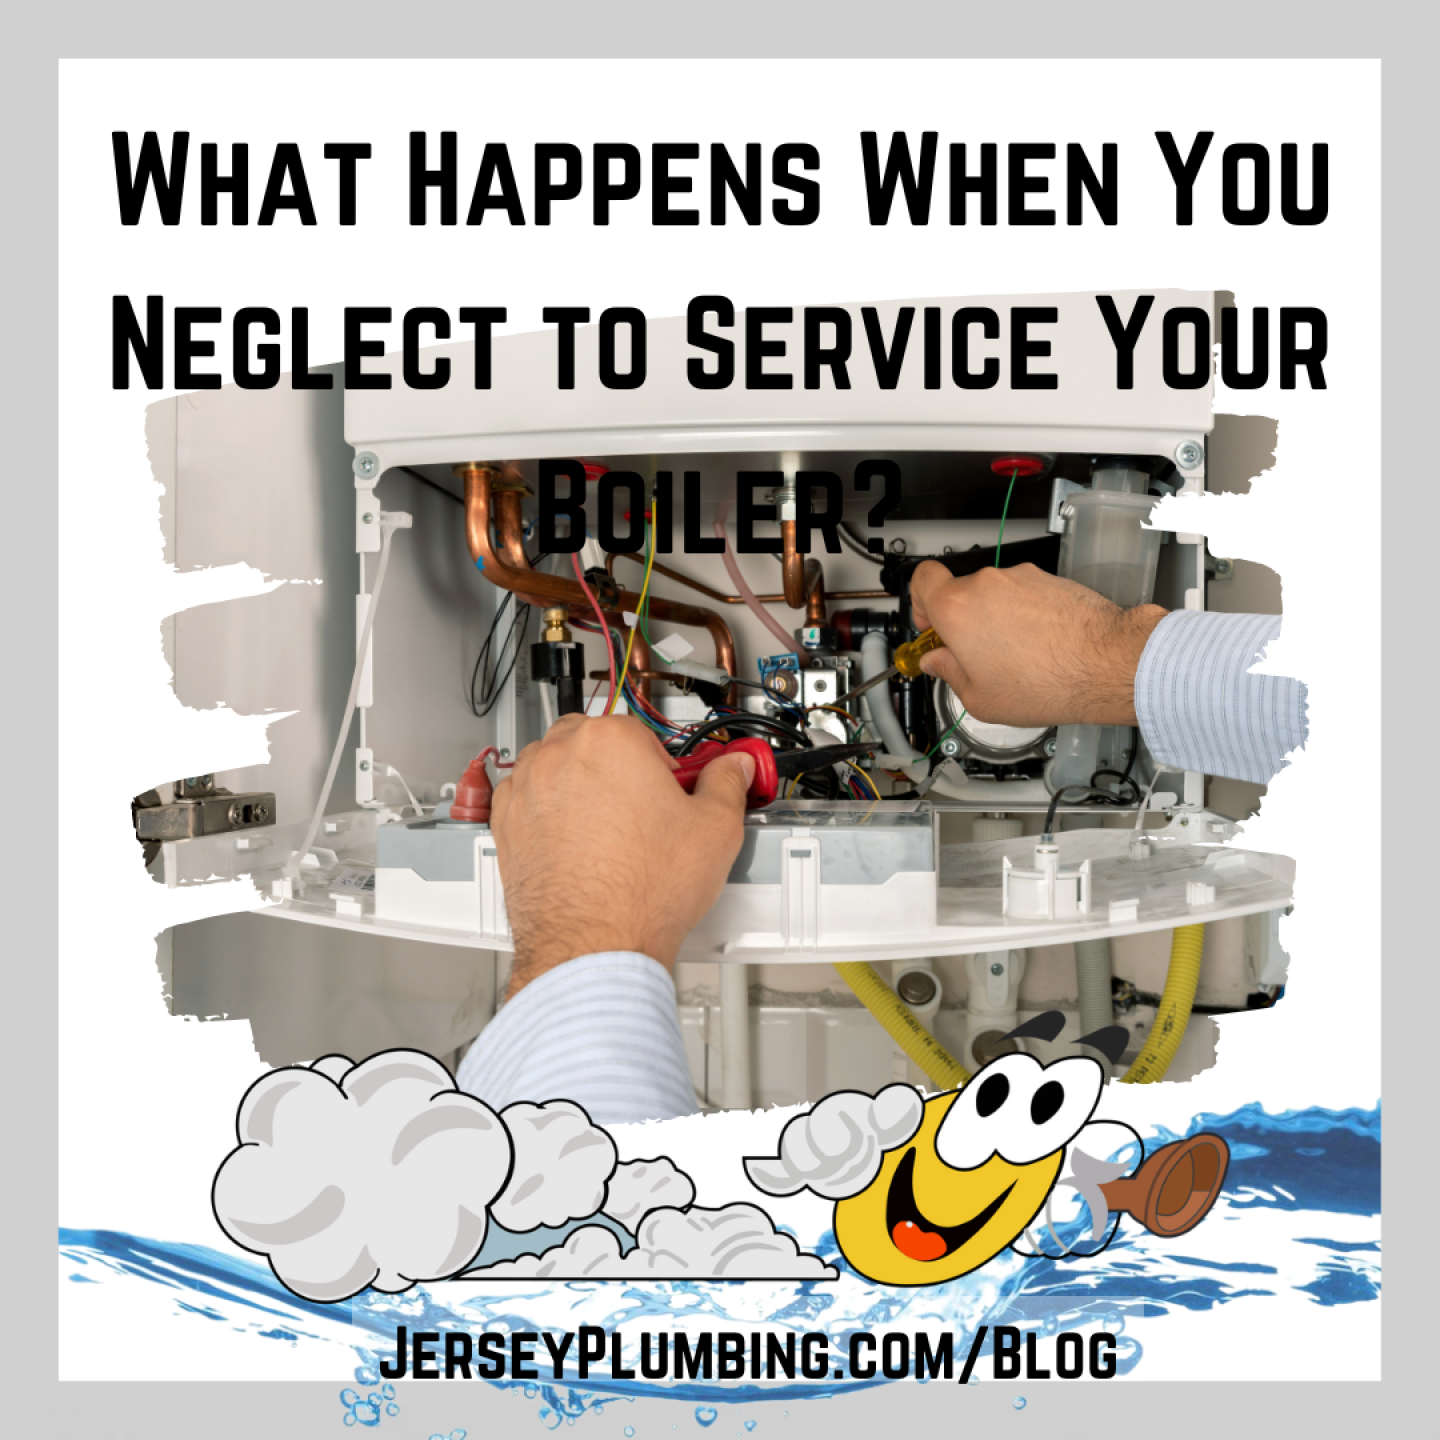
drain water heater

How to Drain Your Water Heater

Draining your water heater is an essential annual household chore. Over time, sediment gathers at the bottom of your water heater. If left to sit, it will harden, preventing your heating source from efficiently heating your water and eventually causing your water heater to burst.

If you hear popping noises coming from your water heater, chances are you are too late. Sediment has hardened, and you should prepare to purchase a new water heater soon, if not right away, to avoid an abrupt loss of funciton (perhaps before you've rinsed all the soap off of your body.) 

However, if you maintain your water heater with regular draining, your water heater should last 8-12 years. (Most go no further than 8 or 10) To check the age of your water heater, you can call the manufacturer with your water heater's serial number. 

Draining Your Gas or Electric Water Heater

(Before performing this task, be sure no one is planning to take a shower or use the dishwasher!)

1) Gather what you need: 

  • A heat proof bucket, (unless you want to use a nearby floor drain) •
  • The garden hose

2) Determine if your water heater is gas or electric.

Remove the side panel look to see if there is a pilot light, if there is you have a natural gas hot water heater. If there is NO pilot light, then it is electric. Remember though that some natural gas heaters also will use electricity.

3) Turn of gas/power.

Turn the knob on the hot water heater's thermostat to “Off”. Turn off gas to hot water heater and turn off the breaker if it is both natural gas and electric. Flip the circuit breaker to OFF for an electric hot water heater.

4) Turn off the water.

Turn Off the cold water valve. Wait for water in the heater to cool down. (Attempting to drain scalding hot water will be problematic and dangerous.) Turn on the hot water in a sink or tub to drain water is still in the pipes, and keep them open until you're done. This will prevent the vacuum effect as you drain the tank. 

3) Attach the hose.

Attach the garden hose to the drain valve on the side of the tank. Make sure the threads are on tight, otherwise there will be leaks. Place the end of the hose in the bucket, or a drain that will not overflow.

4) Open the drain valve and drain.

5) Detach the hose.

After you have finished draining the sediment from the hot water heater, turn the drain valve off and remove the hose.

6)Turn the cold water valve ON.

7)Turn the heating elements in the hot water heater to ON.

Nearly done!

8) Keep your taps open and once they return to normal flow, turn them off.

You will need to wait 30 minutes or so to test for hot water, sediment free.

Not in the mood to haul buckets, or run around turning valves on and off? Jersey Plumbing Service provides Water Heater Maintenance services. Give us a call! (908) 281-7101

water_soft_feat

What is Water Conditioning?

What Is Water Conditioning/Water Softening? 

Water conditioning is the process of removing or altering minerals, chemicals, and contaminants from a water source. Every day, it seems there is a growing concern   about our water supplies containing a lot of contaminants such as calcium, lime, chlorine, ammonia, chloramines, and many other harmful chemicals. (Not all water contaminents, especially when it comes to minerals, are bad for your health, but can nonetheless be harmful to your plumbing.)

Water softening is the removal of calcium, magnesium, and certain other metals in hard water.  Soft water also extends the lifetime of plumbing by reducing or eliminating scale build-up in pipes and fittings. Water softening is usually achieved using lime softening or ion-exchange resins.

There are salt-based water softeners which use brine and special resin beads in separate tanks.  These beads have a negative electrical charge that attracts the positively charged mineral ions of hard water while giving off sodium ions. The attraction causes minerals such as calcium and magnesium to adhere to the resin beads as the water passes through the tank, resulting in soft water.

Salt–free water conditioners use potassium chloride and function more like a descaler than an actual water softener.  This prevents minerals from depositing through the system and can cause damage.

Calcium and lime deposits over time will harm:

Pipes                              

Water Heaters

Faucets

Dishwashers

Coffee Pots

Sinks and showers

If you have ever seen the grainy white film on your coffee pot or on your faucet, that’s it.

How to Know if Your Water Softener is Working

The easiest way to determine how soft or hard is to look for hard water spots in your shower, or just pay attention to how you feel after a shower. Is your skin dry? Do you need more soap than usual to lather? Does your coffee pot get a water stain on the bottom? All of these are signs that your water is  your water might be hard. 

Are Water Softeners Going to be Banned in New Jersey?

California was the first to ban traditional salt based water softeners due to the problems salinated water can reap on farming. Texas, Connecticut, Massachusetts, and Arizona have all created laws affecting water softeners all or in part for this reason.

While there have been no efforts yet to ban traditional water softeners in New Jersey, a large portion of the state is still comprised of farming communities, and it wouldn't be unheard of for New Jersey politics to mirror those of California's on environmental issues. For this reason, you may want to consider salt-free or reverse osmosis option if replacing your water softener. 


should i replace water heater

Should I Replace My Water Heater Before it Fails?

The time to replace your water heater is before it damages your floor/walls or belongings. If you wait for a leak to occur before replacing your water heater, you could experience expensive water damage that can easily lead to expensive mold problems.


If your water heater is located in an area where there is not much concern, such as in an unfinished basement with a concrete floor near a drain or sump pump, then yes, you can likely wait until the water heater has failed to replace it without too many problems.


If your water heater is showing signs of imminent failure, and you would like to prevent further problems, give Jersey Plumbing a call: (908) 281-7101


If you’re not sure if your water heater is headed for failure, check the following:


Dirty Water • Water that is pouring with a rusty or sandy debris can be a sign of water heater failure or old pipes that could be headed for failure. Either way, you’ll want to get a Master Plumber out to assess the problem.


Noises • Hearing pops or crackling noises coming from the water heater is a sign that the sediment at the bottom of the tank has hardened. This causes your heating source to work overtime, driving up your energy costs and driving down your water heater’s effectiveness.


You may also notice water takes longer to heat at this stage. This problem can be prevented by draining your water at least once a year, or by having an experienced plumber drain it for you.


However, once the sediment has hardened, it’s too late to try draining the water heater. It will eventually crack and leak.

Water Temperature • As stated above, sediment can gather at the bottom of your water heater, causing your heating source to work overtime to achieve the same results. If you notice the water isn’t getting hot, you may be able to drain the water and sediment, replace the heating element, or, if hardened sediment is the problem, replace the water heater.


Leaks • When there is water leaking from the water heater it is time to replace it.


Age • It’s best practice to keep a record of when each unit in your home was purchased. If you don’t happen to know how old your water heater is, you can call the manufacturer and supply them with the model number to find out. Water heaters last 8-10 years. If your water heater is 10 years old, we recommend replacing it. If it’s nearing 8, you may want to save up for the replacement and keep that in your emergency fund.  

5 signs water heater failure

5 Signs Your Water Heater is Failing

Jersey Plumbing Offers Quality Water Heater Repair & Replacement Services

As long as the hot water is flowing, your water heater is usually an unsung hero of the household. When the hot water isn’t so hot, however we tend to remember why we love our water heaters so much. If you’ve been neglecting your relationship with your water heater, it may be time to check for signs of failure.

If you catch these Water Heater Problems early, you may prevent the need for a replacement.

1. Dirty Water

Water that is pouring out rusty, metallic, or with sand or debris is likely a sign of failure.

2. Noises

Hearing pops or crackling noises coming from the water heater is a sign that the sediment at the bottom of the tank has hardened. This causes the water heater to work overtime, erroding the efficiency of the water heater and eventually leading to failure if left undrained.

3. Water Temperature

Obviously, the purpose of the water heater is to heat. If you notice a drop or loss of hot water, that's a big red flag for your water heater. 

4. Leaks

When there is water leaking from the water heater it is time to replace it.

5. Age

Hopefully, you have kept records of when you purchased significant units for your home including the boiler, water heater, furnace, etc. While nothing lasts forever, water heaters last between 8 to 12 years. The age of the unit can be identified using the serial number as well.

When it’s time to replace your water heater, there are a variety of options and reliable brands available. Read more about water heater replacement options here. Remember to check on your water heater once every season or so. Always listen for sounds that shouldn’t be there. The water heater should be serviced yearly to prevent sediment from collecting at the bottom of the tank.

8 plumbing tools

8 Plumbing Tools Every Handy Homeowner Should Own

Having the right tool for the right job takes the worry out of minor home repair. Although a butter knife, duct tape and an old rag can work some unexpected miracles, having a well-equipped tool box for basic plumbing repairs such as clogs and leaks can give you the confidence to get the job done, and done right.

toolbox

The Basics for Your Plumbing Toolbox:

plunger

Plunger

1. Plunger - This is the first tool to grab when dealing with clogs in bathtubs, sinks, and toilets. Remember when plunging a toilet, create a firm seal, press down and pull up. You want to vacuum the clog OUT, not push the blockage deeper.

plumbing auger

Plumbing Auger

2. Plumber's Snake, or Plumbing Auger - This is a hand-cranked drain-clearing tool with a long flexible steel cable that's effective at clearing obstructions from tubs, showers, sinks, toilets and drain lines. Use this if the plunger can’t move a clog.

tongue and groove pliers

Tongue-and-Groove Pliers

3. Tongue-and-Groove Pliers – These are the pliers to use when you need to twist, turn, tighten or loosen something. While these come in several sizes, the 9.5” and 12” will likely be most useful.

hacksaw

Hacksaw

4. Hacksaw – This is useful to cut through metal and plastic pipe, nuts, bolts and screw among other things. Hacksaws, so long as the blade is sharp, are a very versatile tool. Make sure you have plenty of extra blades. Be careful when using it as well as when replacing the blades.

Spanner Wrench

Spanner Wrench

5. Spanner Wrench - Used for the tightening and loosening of nuts on items like sink faucets. The long shaft and swiveling jaw can get up and into the narrow space behind a sink and lock onto the nuts. Make sure when buying the moving jaw has a solid setting so it doesn’t slip under pressure. Generally with wrenches two is better than one, vary the sizes.

pipe wrenches

Pipe Wrench

6. Pipe Wrench - These are heavy, large wrenches used to tighten and loosen threaded pipes, fittings and nuts. Get two as you will need one to hold and the other for turning. Although they come in sizes from 6” to 60”, the 10” and 14” should suffice.

Metal File

Metal File

7. Metal File - this smooths the edges of metal pipes after cutting, get two: a rat tail which is round and tapered also a half round a half round which has both rounded and flat surfaces.

toolbox

Toolbox

8. Tool Box - Tool boxes come in a vast array of sizes, and functionality. Some have wheels (great feature), and some can be mounted. Always get a little more room than you need as tool collections tend to grow. Many find it best to have separate toolboxes for separate jobs. (One for Electric Work, One for Plumbing, One for Carpentry, etc.)

Jersey Plumbing(908) 281-7101

Remember! Sometimes the best tool is experience. When you need a Master Plumber to get the job done right, don’t hesitate to reach out to Jersey Plumbing Service for your plumbing needs.

older home plumbing

Buying an Older Home? Prepare for Life With Old Plumbing.

Old homes can have a lot of charm. Old pipes don't contribute to that charm. New Jersey is one of the original 13 colonies that first made up the United States of America, and we have the beautiful, and very old architectural charm to back that up. We're not suggesting that you walk away from that beautiful Victorian with the wrap-around porch and matured rose bushes.

We simply want you to be prepared for what lies in the walls of your older home. And we're not just talking about the 100+ year old homes with plaster and lath walls.

In the world of plumbing, anything older than 1960 is likely using galvanized piping. It's likely that some of that piping has been swapped out over the years, but it's important to keep an eye out for those areas that have not.

Hot Water Pipes Corrode the Fastest; What to Look Out For:

  • Listen to the water heater. Is it constantly running? That could be a sign of a leak in the system. 
  • Check water pressure. Any decrease in water pressure may be a sign of a leak. You may notice this first with hot water pressure, but cold water pipes are also liable to fail. 
  • Check the water bill. A spike in usage can hurt your wallet much more than the numbers on that bill indicate. 

What Kind of Sewer Lines do You Have?

Whether you have a septic and are responsible for the length of the sewer line to the tank, or have public sewer and are responsible as far as the hookup to the mainline (which can often be under the street itself,) as the homeowner, you will be responsible for those lines.

In addition to old age and corrosion, sewer lines can be compromised by tree roots. If there are large trees within 20 feet of your sewer line (or more, depending on the tree) you could be facing major problems in the future, if they're not silently causing one as we speak.

The longevity of your sewer pipes will be greatly dependent on what they are made of. Each of the common pipe materials have different expected useful lives, though external factors such as climate and the vicinity of trees can shorten the lifespan of the pipe.

Transite Sewer Pipes: Also known as AC Pipes (Asbestos-Cement Pipes.) These were installed primarily between the 50's and 70's, and while relatively resistant to corrosion, the technology for connecting these pipes was not as reliable then as today, which can lead to leaks and failures at the joints. The lifespan of these pipes is about 70 years. If you have a 1950 pipe, then look out for failure after the year 2020.

Clay Sewer Pipes: Clay pipes typically last between 50-60 years. They have been in use since about 4000 BC in the widely agreed upon birthplace of city plumbing: Babylonia. While you are not likely to find any Babylonian age clay pipes, it's not uncommon to find these in homes built prior to the 50's and occasionally in homes as late as the 70's.

Cast Iron Sewer Pipes: These were installed most often between the 50's and 70's and will last 75-100 years in most residential applications, so you can expect your 1950 Cast Iron Pipe to fail as early as the year 2025.

Orangeburg Sewer Pipes: These pipes begin to deform after 30 years and tend to fail after 50. Orangeburg pipe was used from 1860 until the 1972. If you have an orangeburg pipe, you should anticipate a failure in the next few years.

Lead Sewer Pipes: Lead sewer pipes can last 100 years, but they are not without their dangers. Lead pipes are gray in color and can be easily scratched with a knife. If you have lead pipes, you will want to replace them immediately, as they can leach lead into the water supply.

PVC Sewer Pipes: If you have PVC sewer pipes, thank your lucky stars. These pipes should last a good 100 years. PVC started rolling out in the 40s, so the year 2040, if you have a 1940's PVC pipe, is when you need to start worrying. (However, failure to take care of your pipes properly can always result in an early failure.

Read More About Sewer Lines in Old Homes Here. 

Preventing Leaks in Your Old Pipes

Older homes, prior to 1960 are often galvanized pipes. While previous homeowners may have replaced pipes that were corroded or clogged, that leaves many more that may be damaged or rusted that will need replacing.  An easy way to check is turn on your hot water, as they hot water pipes are the first to rust. If the pressure is low, this could be a sign of problems with your galvanized pipes. 

Other issues include:

• Old and Inefficient Plumbing Fixtures

          These may look beautiful, but everything has a lifespan. With constant use, these old fixtures will go through the normal process of wear and tear, leading to leaks and inefficient water flow. When renovating an older home, replace old fixtures with more efficient ones that help conserve water.

• Hard water – Pipes that are well maintained may last longer. Hard water does and will take a toll on pipes.

      Brass supply pipes can last between 40 to 70+ years. Copper pipes can last in excess of 50 years. Galvanized steel pipes can last between 20 and 50 years. Cast iron drain lines have a lifespan of 75 to 100 years. Lead pipes, used in the early 1900s, have a life expectancy of 100 years. PVC drain lines will last indefinitely.

You have to think about the age of the home plumbing as well as the wallpaper you want to remove. Jersey Plumbing can help with those plumbing choices so you can truly have the older home of your dreams.


The Best Prevention for Pipe Disasters is to Identify the problems before they happen, and have a licensed plumber from Jersey Plumbing Service replace any sections of pipe that aren't performing well, or that are heading for failure. Be sure to insure your water and sewer lines from the city if you have city water. It's far better to pay a deductible, than the cost of tearing up the ground from the house... sometimes to halfway under the street.

older sewer lines what to expect

Older Homes & Sewer Lines: What to Expect from Your #2 Plumbing.

Unfortunately, most homeowners have no idea what kind of sewer pipe they have, until they have cause to dig it up. However, when you are purchasing a home, there is no harm in asking the seller to disclose this information if they happen to be aware of it. If they've had to dig up a septic, have had a sewer line inspection, or have trenched the yard for other reasons, there's a possibility that they've had a sneak peak at what kind of sewer pipe you are buying.

old pipes1

If the house is in an older development, with houses built by the same builder, you can also pose the question to the neighborhood via Facebook or Nextdoor, as you likely have what they have. Otherwise, you'll have to be prepared for a number of possibilities based on the year your house was built.

In addition to old age and corrosion, sewer lines can be compromised by tree roots. If there are large trees within 20 feet of your sewer line (or more, depending on the tree) you could be facing major problems in the future, if they're not silently causing one as we speak. But the longevity of your sewer pipes will be greatly dependent on what they are made of. Each of the common pipe materials have different expected useful lives, though external factors such as climate and the vicinity of trees can shorten the lifespan of the pipe.

The Various Older Sewer Lines that Can be Found in Older Homes:

Transite Sewer Pipes: Also known as AC Pipes (Asbestos-Cement Pipes.) These were installed primarily between the 50's and 70's, and while relatively resistant to corrosion, the technology for connecting these pipes was not as reliable then as today, which can lead to leaks and failures at the joints. The lifespan of these pipes is about 70 years. If you have a 1950 pipe, then look out for failure after the year 2020.

Clay Sewer Pipes: Clay pipes typically last between 50-60 years. They have been in use since about 4000 BC in the widely agreed upon birthplace of city plumbing: Babylonia. While you are not likely to find any Babylonian age clay pipes, it's not uncommon to find these in homes built prior to the 50's and occasionally in homes as late as the 70's.

Cast Iron Sewer Pipes: These were installed most often between the 50's and 70's and will last 75-100 years in most residential applications, so you can expect your 1950 Cast Iron Pipe to fail as early as the year 2025.

Orangeburg Sewer Pipes: These pipes begin to deform after 30 years and tend to fail after 50. Orangeburg pipe was used from 1860 until the 1972. If you have an orangeburg pipe, you should anticipate a failure in the next few years.

Lead Sewer Pipes: Lead sewer pipes can last 100 years, but they are not without their dangers. Lead pipes are gray in color and can be easily scratched with a knife. If you have lead pipes, you will want to replace them immediately, as they can leach lead into the water supply.

PVC Sewer Pipes: If you have PVC sewer pipes, thank your lucky stars. These pipes should last a good 100 years. PVC started rolling out in the 40s, so the year 2040, if you have a 1940's PVC pipe, is when you need to start worrying. (However, failure to take care of your pipes properly can always result in an early failure.


bg

Protecting Your Pipes From the Cold

There is plenty advice out there for winterizing a home that will be vacant. But what about the house we’re living in, when the temperature drops significantly? If you’ve ever experienced a burst pipe, you know it is one of the most costly damages that can occur. There are some steps you can take to reduce the chances of frozen, burst pipes.

Preparing Garden Spigots for Winter:

Before the cold arrives, you should be removing, draining, and storing all of your garden hoses. The inside valves (bibs) that feed your garden spigot should be closed, and the outside hose bibs should be open to allow any water in the line to drain out. Keep the outside valve open.

Preparing Poorly Insulated or Non-insulated Pipes for the Cold:

Pipes that run along outside of the home or are in colder places such as the garage or along an exterior wall that isn’t well insulated can be fitted with a “pipe sleeve” to help insulate them from the cold. Building supply stores carry these in a number of sizes. If there is an extreme dip in temperature, the pipes under your sink on an exterior wall may be especially prone to freezing.

You can keep the thermostat at a minimum of 55 degrees and keep a slow drip in your faucet to prevent freezing. If these efforts have failed in the past, you may want to keep your cabinet doors open, and place an old pillow between the pipes and the wall, in lieu of pipe sleeves.

Leaving home during the winter

If you do have to leave home during the winter, do not shut off the heat. Keep the thermostat at a minimum of 55 degrees, and open the cabinets to allow the warm air to reach the pipes under sinks.

Preparing for the Worst Case Scenario

Sometimes, despite our best efforts, pipes can freeze. An unanticipated power outage or heating fuel shortage can result in no method to heat your home. If your pipes do freeze or burst, you will want to know exactly where the main water valve is in your home in case you need to shut it off.

chemical scale

Chemical Scale: That White Stuff on Plumbing Fixtures

You’ve seen it, that crusty white stuff on your faucets, or in the bottom of your electric kettle. It’s calcium, magnesium and lime scale, (just some of the chemicals in your water.) Cleaning scale off of your fixtures is relatively simple. Distilled vinegar and a toothbrush, and any number of life hack blogs can tell you how to remove chemical scale. But what if you could prevent it? Some vinegar and a toothbrush may be a solution for your faucets, but the hard water problems on the outside of your fixtures are not nearly as bad as the accumulation of scale in your pipes and throughout your plumbing system.

scale on bathtub faucet

Over time hard water deposits affect:

  • Pipes                              
  • Water Heaters
  • Faucets
  • Dishwashers
  • Coffee Pots
  • Sinks and showers
  • Your hair
scale on faucet

If you have had scale issues, consider calling in Jersey Plumbing Service, (908) 281-7101, to assess the condition of your pipes as well as your hard water handling systems. 

Hard Water Solutions for Your Home Plumbing

Reverse Osmosis Water Filtration

This system improves taste, odor and appearance of water by removing contaminants that cause taste and odor problems. It can boggle the mind how many contaminants are in water. And more importantly not all city/towns will take the extra steps to remove more chemicals than they are required to by law. Reverse Osmosis systems remove pollutants from water including nitrates, pesticides, sulfates, fluoride, bacteria, pharmaceuticals, arsenic and much more. These systems have very few moving or replaceable parts make Reverse Osmosis systems easy to clean and service.

Water Softeners

Water softening is the removal of calcium, magnesium, and other metals in hard water. Softer water also extends the life of plumbing by reducing or eliminating scale build-up in pipes and fittings. Water softening is achieved by a mineral tank.

It's filled with small polystyrene beads, also known as resin or zeolite. The beads carry a negative charge. In an ion exchange the resin beads act as the negative charge, and calcium and magnesium both carry a positive charge. The concept behind a water softener is they trade the minerals for something else: sodium. Dual-Tank Water Softeners are also available for larger families who need water frequently. As one tank is regenerating, the other can be in use.

Note: Some states and communities on both coasts have taken issue with concerns over brine backwash ending up in their ground or water supply and have banned the use of salt based water conditioners.

1 plumbing noise

One Plumbing Noise You Should Be More Worried About than You Are

Small Plumbing Problems usually start out as small noises. We all hear them, but it’s easy to ignore them. It’s not a problem YET, we tell ourselves. But they are, and they’re problems that can be solved much more affordably sooner than later.

The Not-So-Harmless Drip

A dripping faucet is easily fixable, but, quite often, homeowners ignore the sounds of dripping in their house, assuming it’s an easily fixed faucet – when in reality, it’s a pipe headed for total failure in the walls.

If you hear a leak and cannot readily assign that leak to a fixture (which you should also fix immediately) then you will want to examine the walls where you are hearing the drip.

If you catch a leak while it’s still small, you may not notice any changes in water pressure, but any changes in water pressure should be noted and addressed as well.

You may notice that a wall has become spongy and wet to the touch. If you shine a flashlight across your wall, you might see a section that is more reflective than the rest. This is a possible indicator of moisture. If you notice these things, get an experienced plumber out as soon as possible.

If you can hear a drip upstairs, check the rooms below as well. You will want to feel the walls with your hand. If there is plumbing on the floor above you, you will want to check the ceilings. If you notice a wet ceiling where there is no plumbing, you’re probably dealing with a roof leak. Those don’t get any cheaper the longer you wait either. You’ll want to inspect those immediately.

Your family may give you a funny look as you run around the house with a flashlight, feeling up walls and ceilings, trying to chase down the sound of a drip. But it’s much better than the look they’ll give you when next year’s Christmas budget is blown because you didn’t locate and repair a leak in time to prevent thousands of dollars of damage inside your walls.

Jersey Plumbing Service
PO Box 7371
Hillsborough, NJ 08844
Click to Email Us
Fax: 1-908-647-1517

NJ Masters Plumbers License #7359

Copyright © 2018 All Rights Reserved
Site Designed & Managed by Lattice Marketing